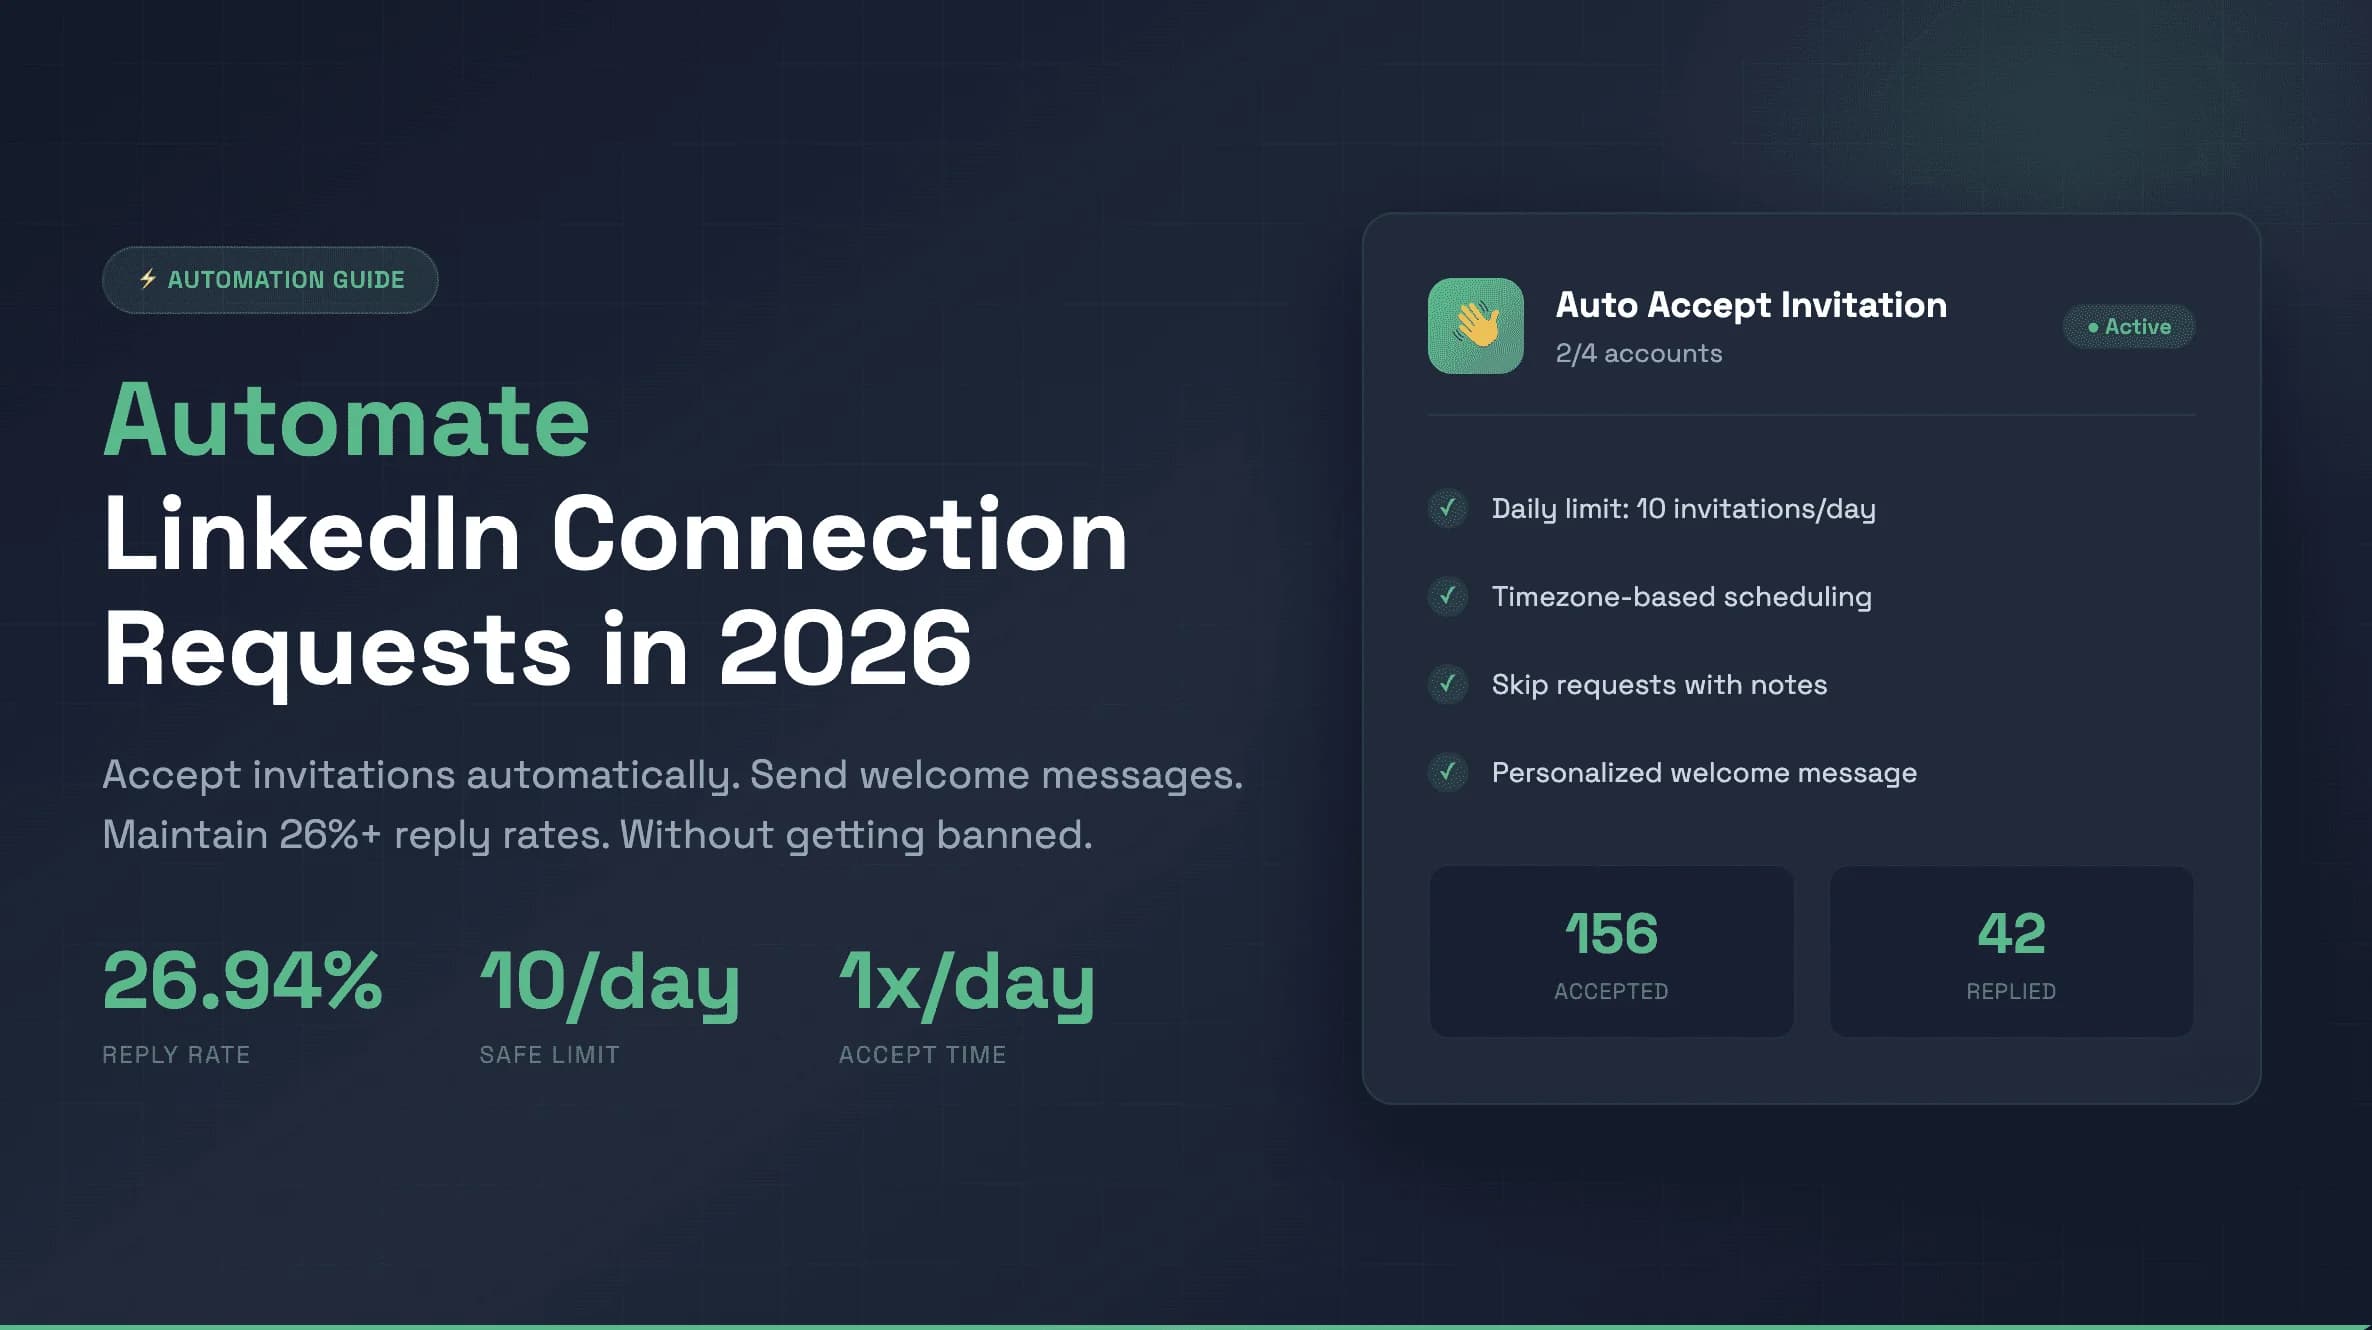
How to Automatically Accept LinkedIn Connection Requests (and Send a Welcome DM)
Learn how to automatically accept LinkedIn connection requests and send personalized welcome DMs. Step-by-step ReactIn setup, compare 5 tools, and maintain 26%+ reply rates safely.
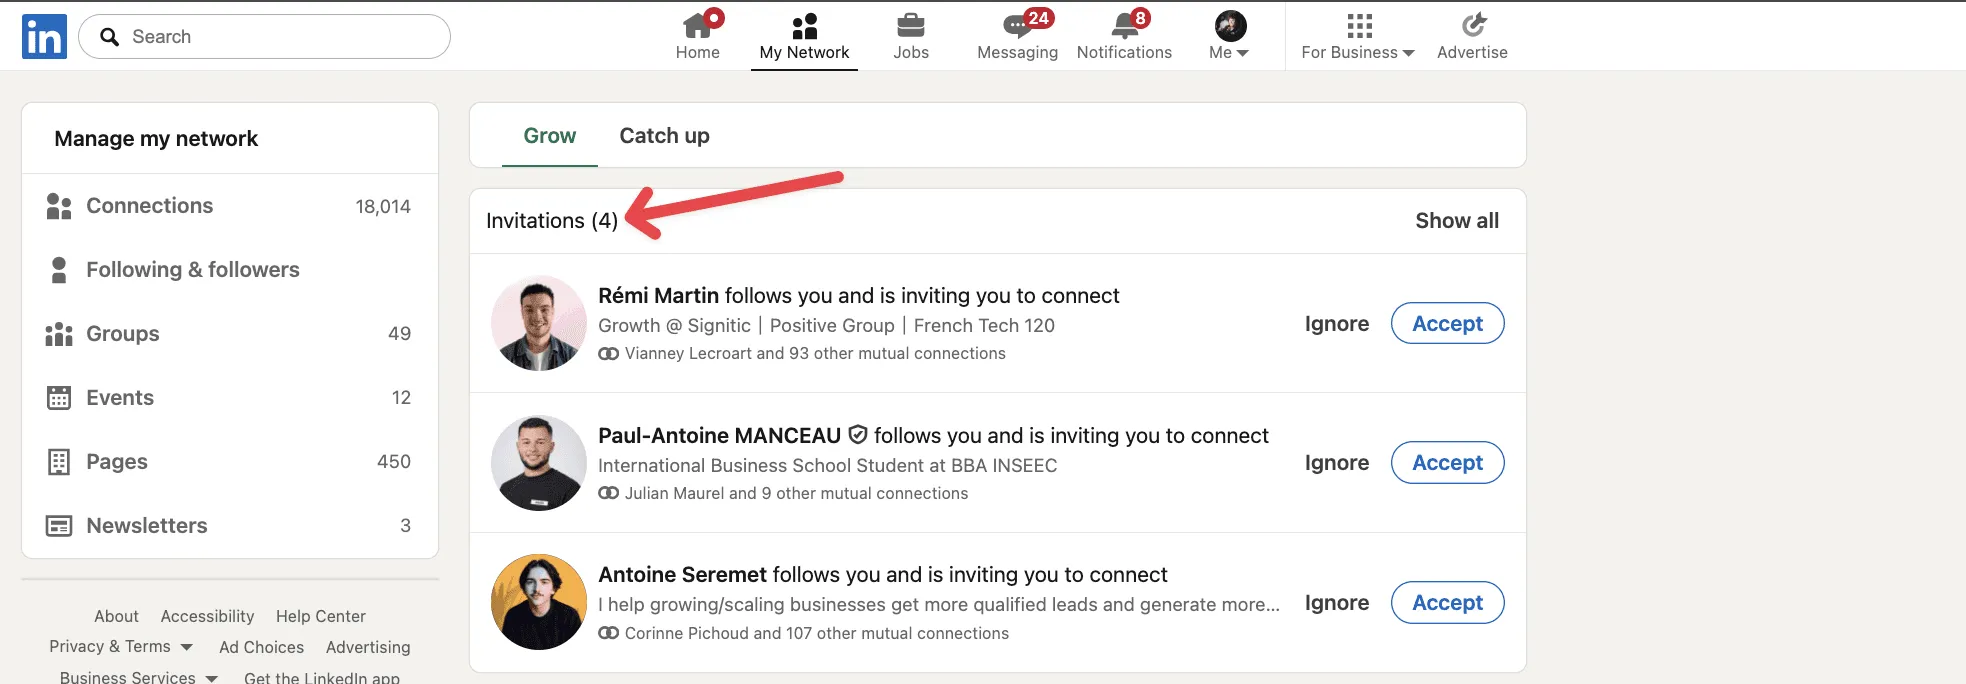
You're receiving dozens of LinkedIn connection requests, but every request you don't accept the same day is a lost opportunity. You need a way to automatically accept LinkedIn connections - and even automate your LinkedIn invitations.
LinkedIn has over 1 billion members. When someone sends you a connection request, they're signaling interest. They found your profile, liked what they saw, and clicked "Connect." That's a warm lead - if you act fast enough. The best auto accepter for LinkedIn connections handles this for you.
days: average time to manually accept a LinkedIn connection request
Based on data from 4 LinkedIn accounts over 3 months
This guide shows you exactly how to automatically accept LinkedIn connection requests, set up LinkedIn auto connect, send personalized welcome DMs, and automate invitations on LinkedIn - safely and on autopilot.
Why You Need a LinkedIn Auto Accepter for Connections
When someone sends you a connection request, they're showing active buying intent. They found your profile, were curious about your offer, and took action. A LinkedIn auto connect tool ensures you never miss these warm leads.
But here's the problem: most professionals take 3-5 days to accept connection requests. By then, the person who sent the request has already moved on, connected with a competitor, or simply lost interest. You need to automate LinkedIn connections to keep up.
Using a tool to automatically accept LinkedIn connections solves this by responding the same day, while the intent is still fresh. LinkedIn automatic connections mean higher reply rates, more conversations, and a growing network on autopilot.
LinkedIn members worldwide - your next client is already sending you a request
LinkedIn official stats, 2025
Manual vs Automatic: What You're Losing
We tested auto-accept automation on 4 LinkedIn accounts for 3 months. The difference was dramatic:

Before automation:
- Average acceptance time: 2-3 days
- Reply rate to welcome messages: 12%
After automation:
- Average acceptance time: same day (during working hours)
- Reply rate to welcome messages: 26.94%
That's a 125% increase in reply rates - just by accepting connections faster.
reply rate on welcome messages after enabling auto-accept
Measured across 4 LinkedIn accounts over 3 months
What Is the Best Auto Accepter for LinkedIn Connections? (5 Tools Compared)
Looking for the best auto accepter for LinkedIn connections? Not all tools handle LinkedIn automated invitations the same way. Here's a quick comparison of the most popular options for LinkedIn auto connect:
| Tool | Auto-Accept | Welcome DM | Safety Features | Type |
|---|---|---|---|---|
| ReactIn | ✅ Built-in | ✅ Personalized | Smart limits, timezone, skip notes | Cloud-based |
| Dux-Soup | ✅ With setup | ✅ Basic | Daily limits only | Chrome extension |
| Linked Helper | ✅ With setup | ✅ Templates | Daily limits, delays | Desktop app |
| Expandi | ❌ Manual | ✅ Sequences | Smart limits, warmup | Cloud-based |
| Waalaxy | ❌ Manual | ✅ Sequences | Daily quotas | Cloud-based |
ReactIn is the only tool with built-in auto-accept + smart safety features (skip notes, randomized volumes, timezone scheduling). Cloud-based means no browser extension to install - it runs 24/7 even when your computer is off.
LinkedIn Auto-Connect Tools & Software: What You Need to Know
Searching for a LinkedIn auto connect tool or LinkedIn auto connection software? There are two distinct categories: tools that auto-accept incoming connection requests, and tools that auto-send outbound connection requests (LinkedIn auto connector). Understanding the difference is key to choosing the right software.
Auto-accept vs auto-connect: what's the difference?
These terms are often confused, but they serve different purposes:
- Auto-accept tools automatically accept incoming connection requests that others send you. You're responding to interest that already exists.
- Auto-connect tools automatically send outbound connection requests to people you want to connect with. You're initiating new relationships.
- All-in-one platforms handle both directions - auto-accepting inbound requests AND auto-sending outbound invitations. ReactIn is the leading example.
Top LinkedIn auto-connect software compared
Here's how the most popular LinkedIn auto connect tools stack up for outbound connection automation:
| Tool | Auto-Connect (outbound) | Auto-Accept (inbound) | Best for |
|---|---|---|---|
| ReactIn | ✅ SmartList campaigns | ✅ Built-in | Full automation (both directions) |
| Dux-Soup | ✅ Browser-based | ✅ With setup | Chrome users who stay at their desk |
| Expandi | ✅ Cloud sequences | ❌ Manual only | Outbound-only campaigns |
| Waalaxy | ✅ Multi-channel | ❌ Manual only | LinkedIn + email sequences |
If you're looking for a complete LinkedIn auto connector, ReactIn is the only tool that handles both auto-connect (outbound) and auto-accept (inbound) in one platform. Most competitors force you to choose one direction or use multiple tools.
Step 1: Create Your Received Connections SmartList
The SmartList is the foundation of your auto-accept automation. It automatically tracks everyone who sends you a connection request on LinkedIn.
How it works
Once you create this list in ReactIn:
- It updates daily with new pending connection requests
- New requests are automatically added to your leads list
- It feeds directly into a campaign that accepts requests and sends messages
Setup instructions
Sign up for ReactIn
Create your free account at ReactIn.io if you haven't already.
Go to Lists → New List
Navigate to the Lists section and click the "New List" button.
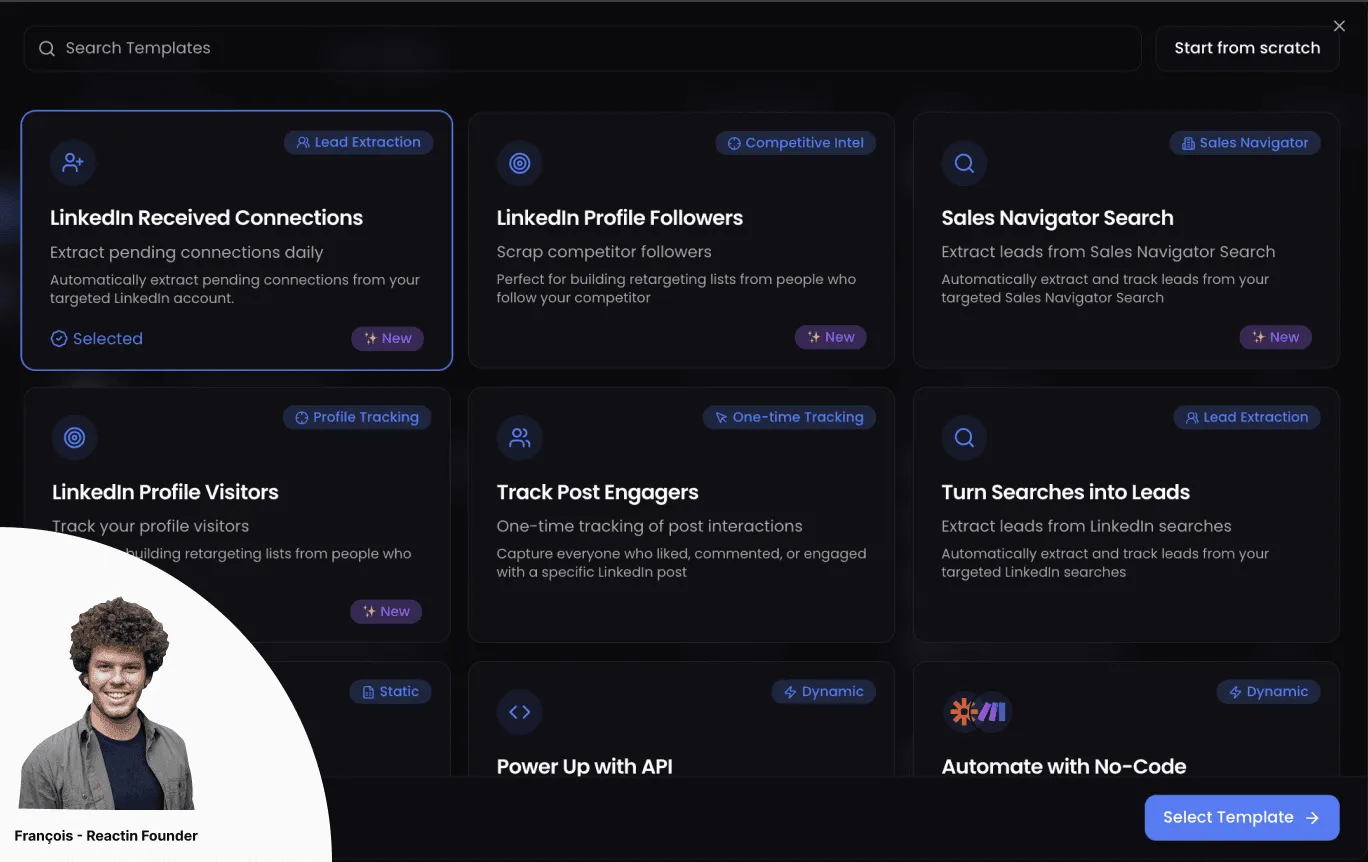
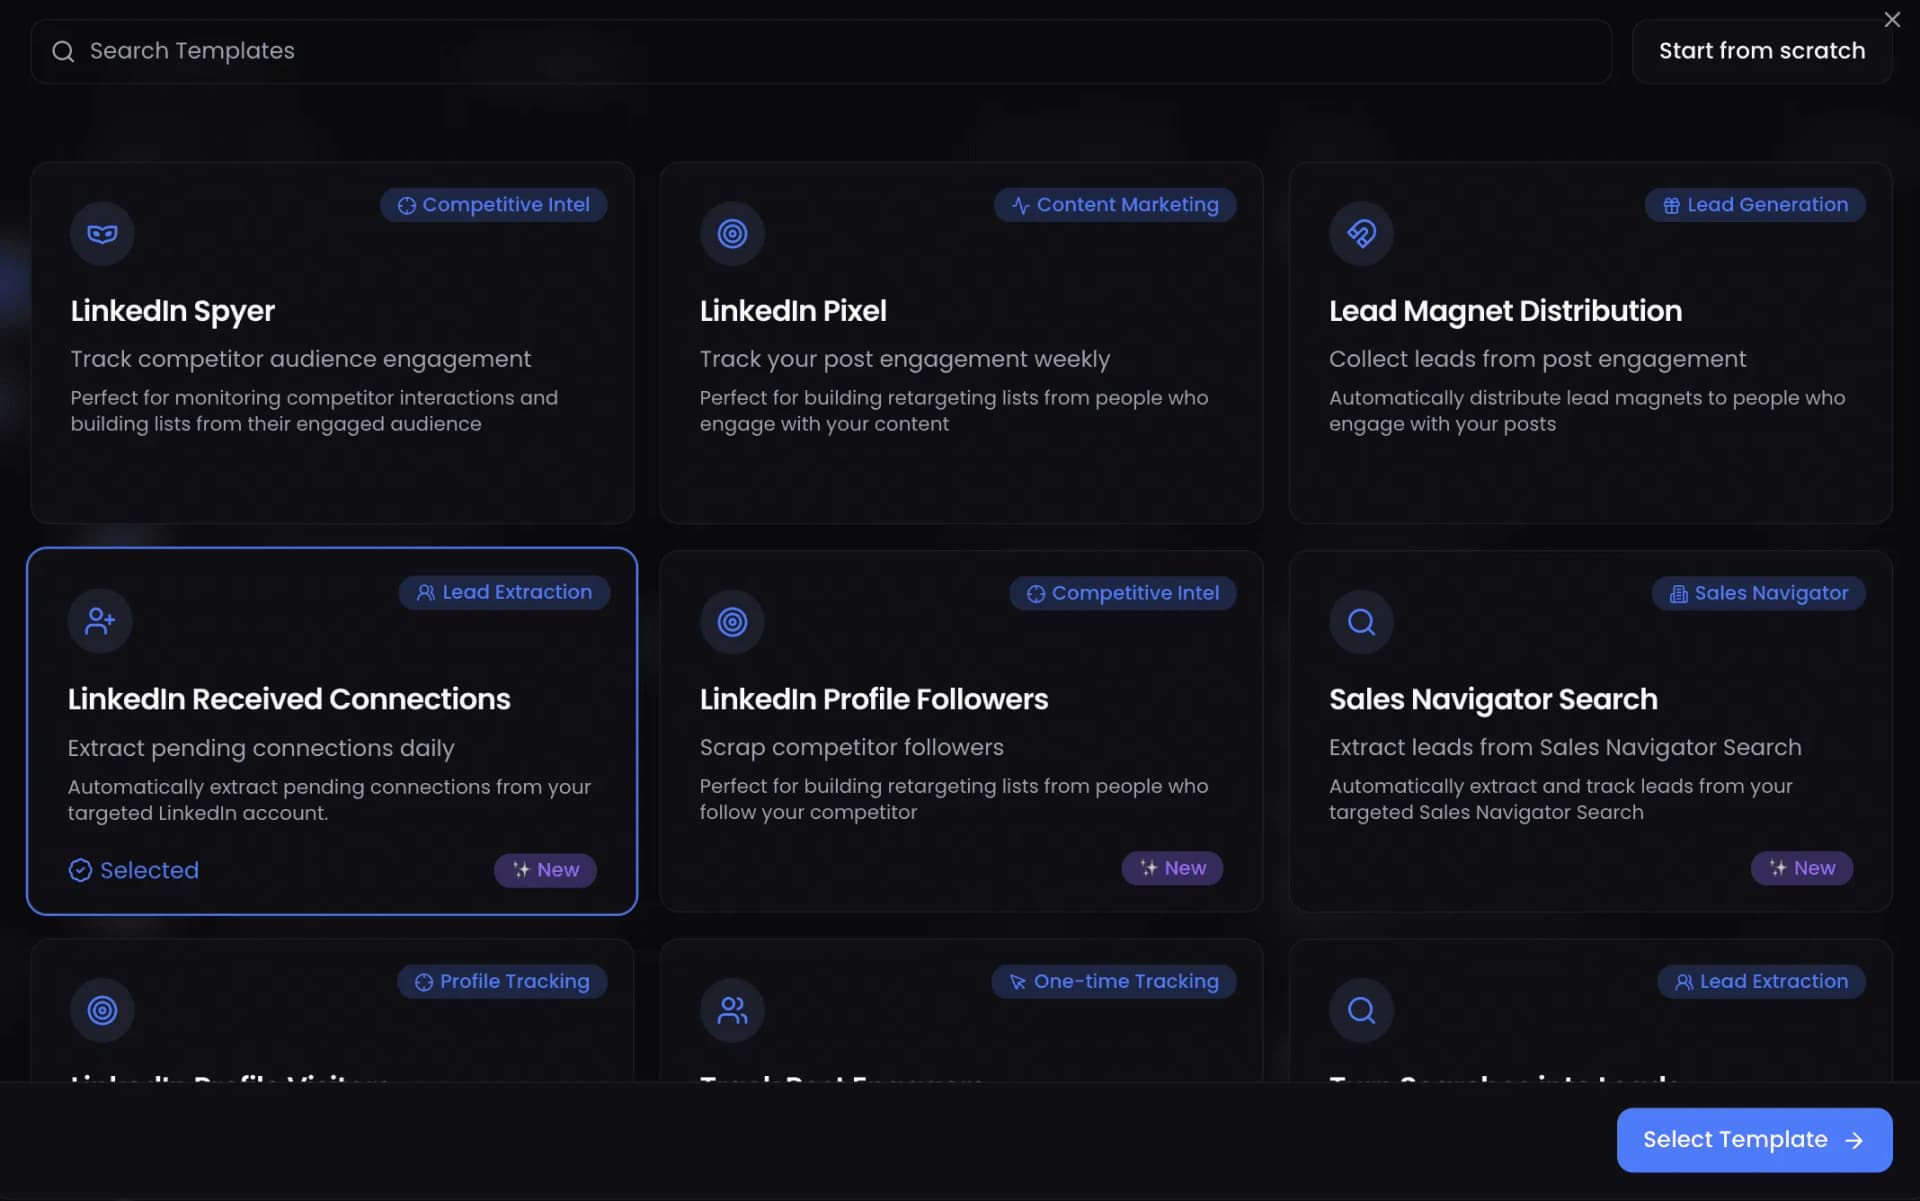
Select LinkedIn Received Connections
Choose the "LinkedIn Received Connections" template from the available SmartList types.
Click Select Template
Confirm your template selection to proceed with the configuration.
Choose your LinkedIn account
Select which LinkedIn account you want to monitor for incoming connection requests.
Click Continue
Move to the next step of the setup process.
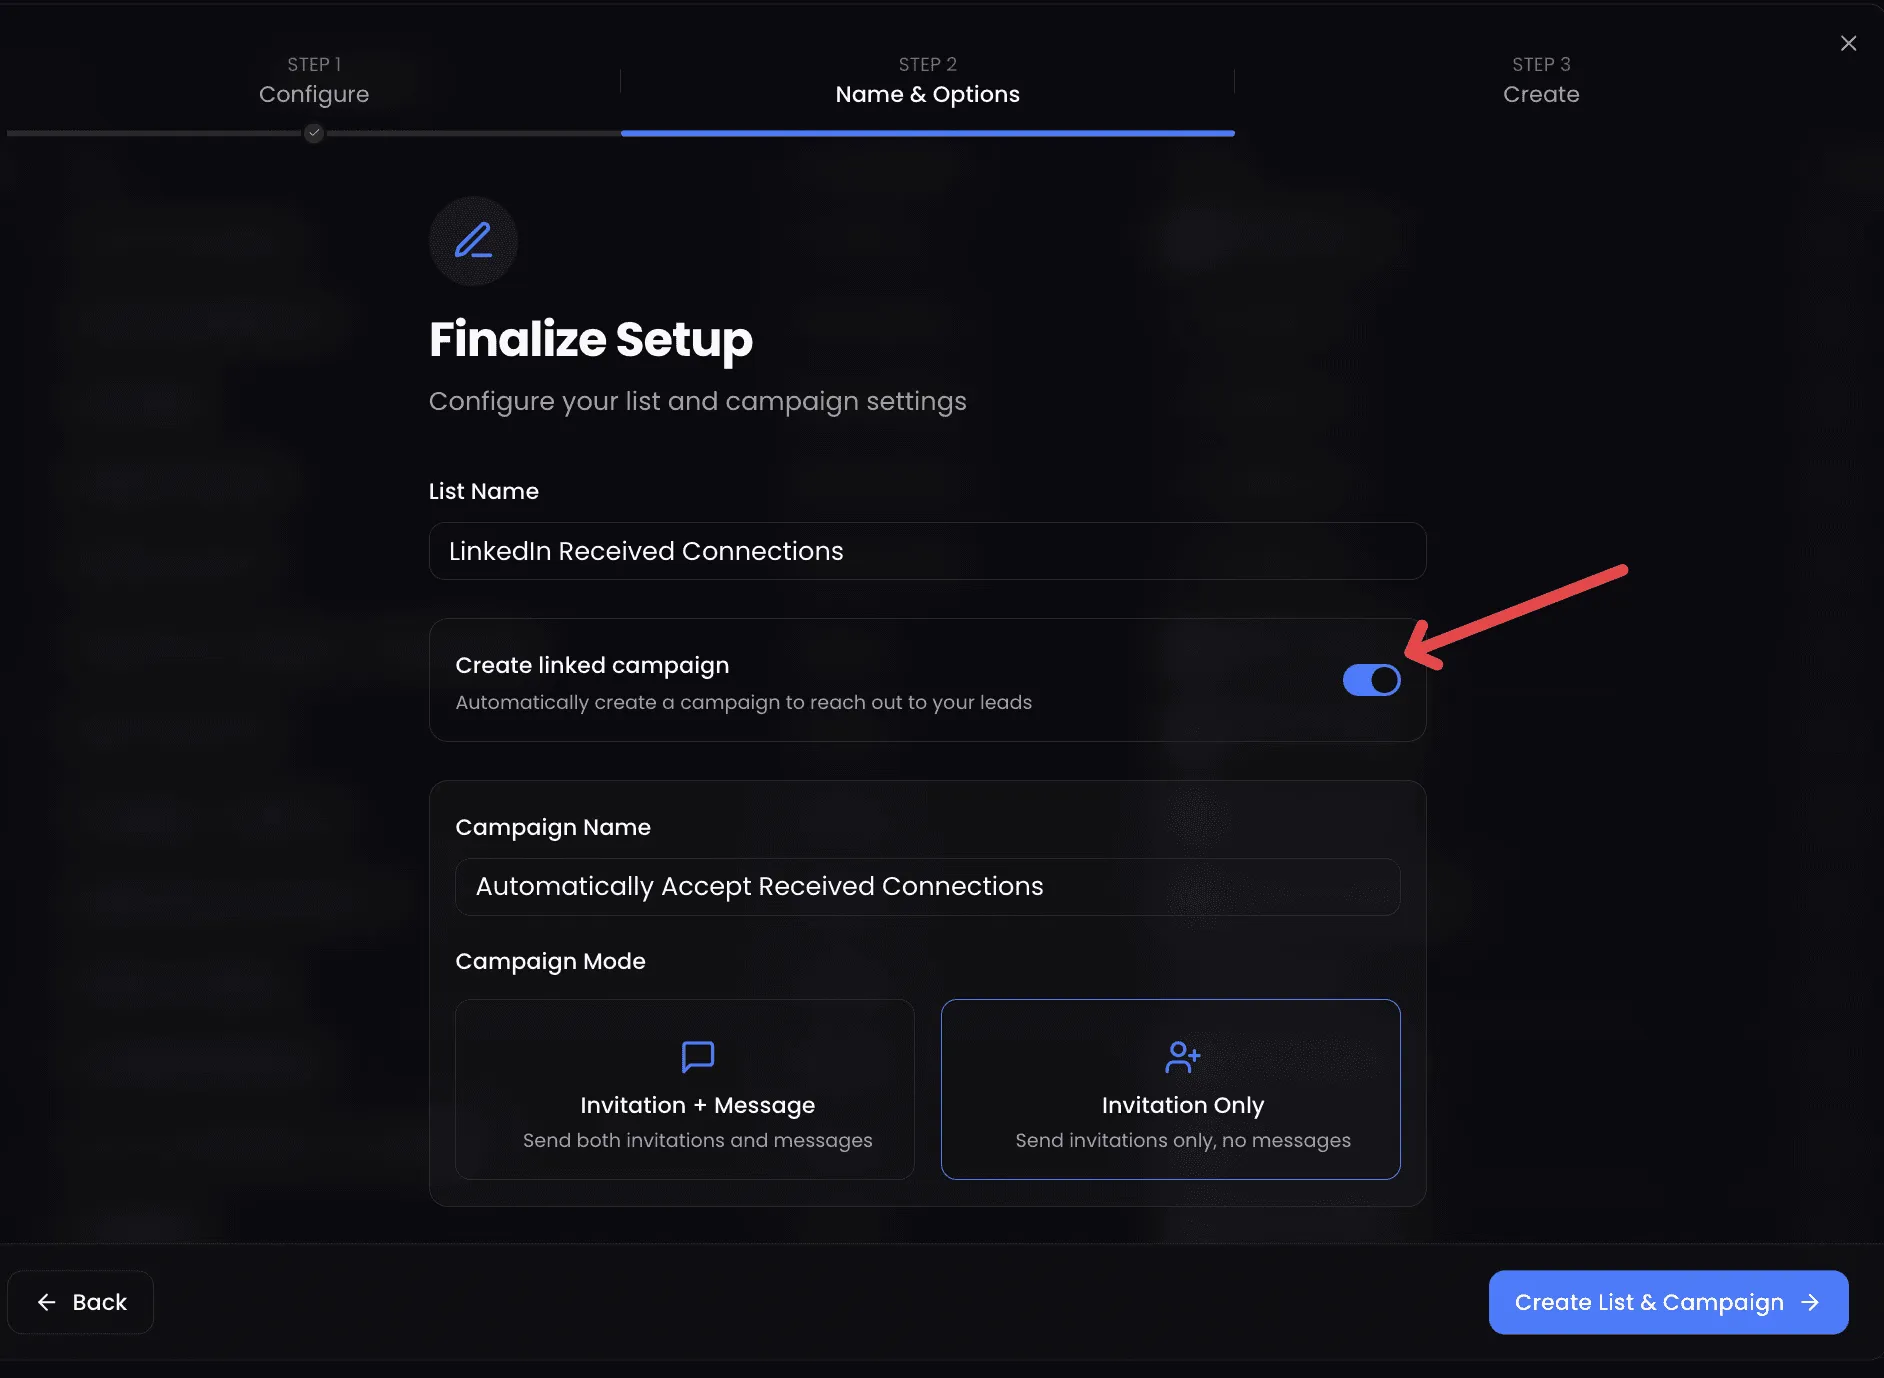
(Optional) Rename your list
Give your list a descriptive name. Toggle off "Create linked campaign" - we'll set up the campaign manually in the next step for more control.
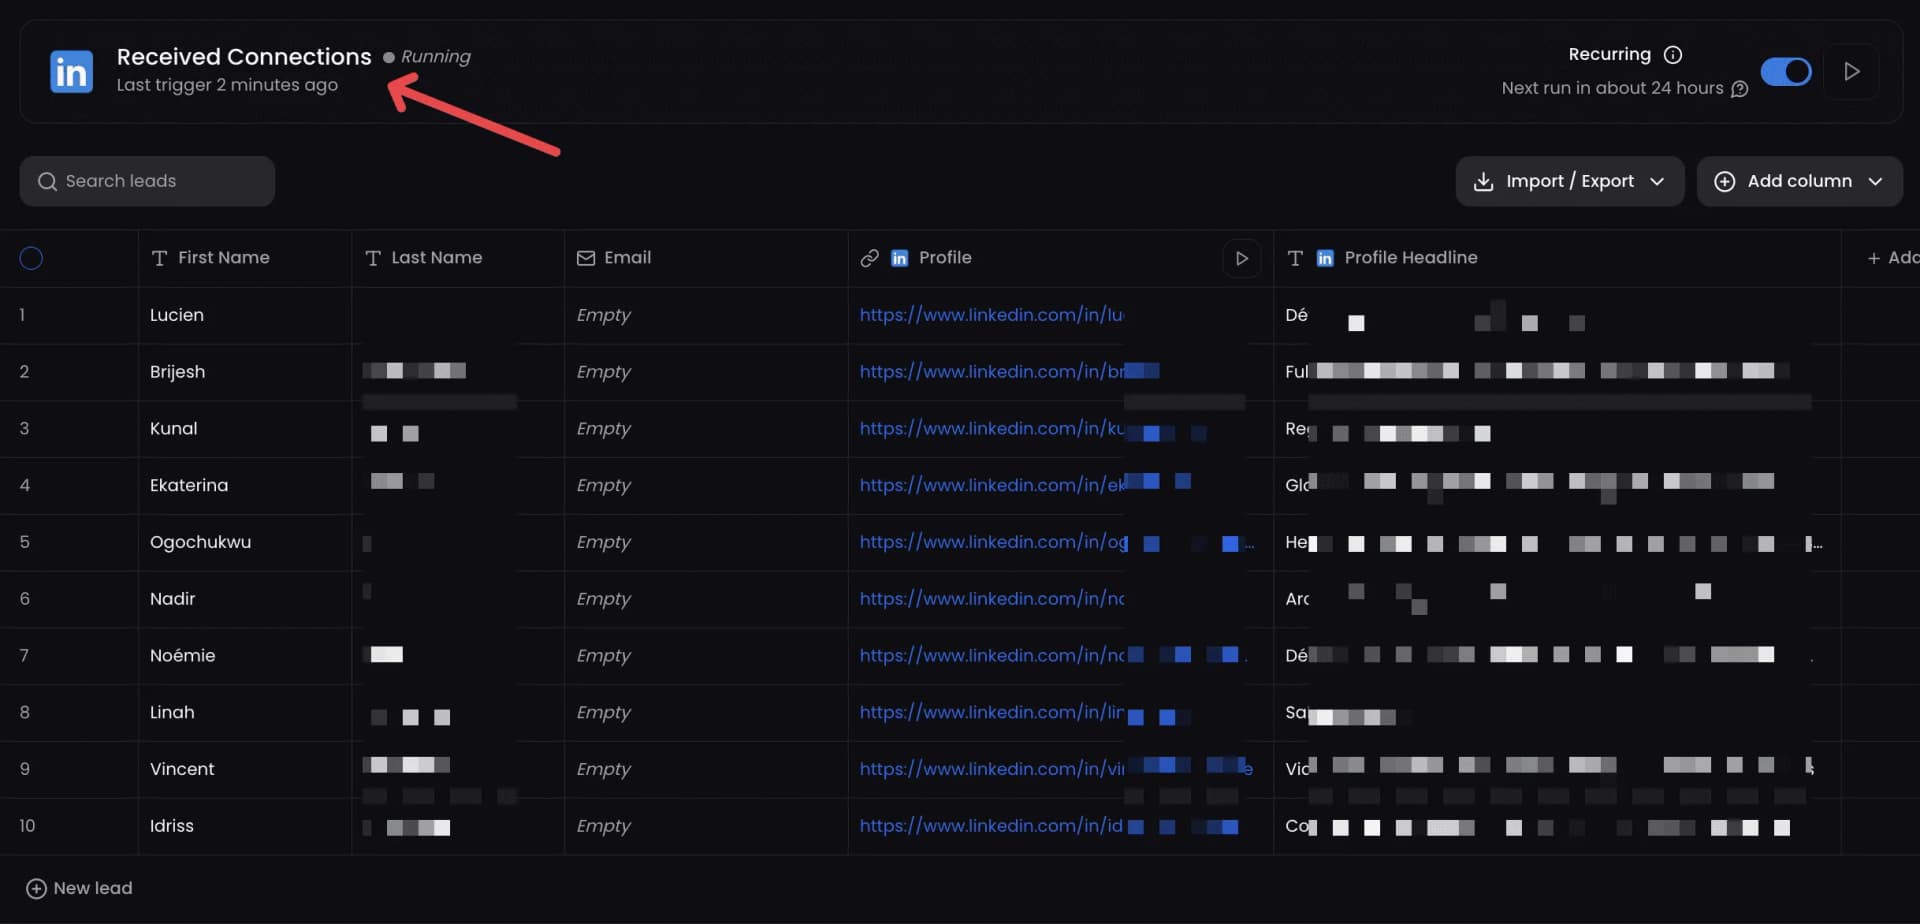
Click Create List
Your SmartList is now active! ReactIn will automatically monitor your incoming invitations.
Step 2: Launch the Auto-Accept + DM Campaign
Now that your SmartList is active and tracking incoming requests, let's set up the campaign that will automatically accept them and send a welcome message.
Go to Campaigns → New Campaign
Navigate to the Campaigns section and create a new campaign.
Click Create Campaign
Start the campaign creation wizard.
Name your campaign
Give it a clear name like "Auto-Accept + DM Connection Requests".
Select your SmartList as the source
Choose the "LinkedIn Received Connections" list you just created.
Choose the campaign mode
Select "Invitation & Message" to auto-accept and send a DM, or "Invitation Only" to just accept without messaging.
Select your LinkedIn account
Choose the same LinkedIn account connected to your SmartList.
Write your welcome message
If you chose "Invitation & Message", craft your personalized welcome DM. Use variables like {{firstName}} for personalization.
Click Start Campaign
Your auto-accept automation is now live! ReactIn will accept requests and send messages automatically.

Example welcome DM template:
“Hey {{firstName}}, thanks for connecting! Anything I can help you with? 🙂”
Built-in campaign safety
- Accepts a random number of requests per day
- Runs once daily during your working hours
- Skips sending a DM if a conversation already exists
Does LinkedIn Automatically Send Connection Requests?
This is one of the most common questions about LinkedIn: does LinkedIn automatically send connection requests on your behalf? The short answer is no - LinkedIn does not automatically add connections or send invitations without your action.
Every connection request on LinkedIn is initiated by a user (or by a third-party automation tool the user has set up). LinkedIn itself never generates automatic invitations. However, several features can create the illusion that requests are being sent without your knowledge.
Why it looks like LinkedIn sends invites automatically
- Synced contacts: If you imported your email contacts or phone contacts into LinkedIn, the platform may suggest sending invitations to those people. If you clicked "Select All" during import, you may have mass-invited without realizing it.
- Mobile app permissions: The LinkedIn mobile app can access your phone's contact list. LinkedIn may prompt you to invite contacts, and a quick tap can send dozens of invitations at once.
- "People You May Know" suggestions: LinkedIn's algorithm suggests connections based on shared contacts, companies, or schools. Some users accidentally click "Connect" while scrolling through suggestions.
- Third-party tools: If you've used a LinkedIn automation tool in the past, it may have sent connection requests on your behalf. Always review your automation settings.
If you're receiving connection requests you didn't send, check your LinkedIn settings under "Sync contacts" and revoke any email or phone sync permissions. Also review any third-party apps with access to your LinkedIn account.
How to Auto-Message After Connecting on LinkedIn
One of the most powerful features of LinkedIn automation is the ability to send an automatic connection message - a welcome DM that's sent immediately after someone accepts your connection request (or you accept theirs). This LinkedIn auto message after connecting turns every new connection into a conversation starter.
Setting up automated welcome messages in ReactIn
Choose "Invitation & Message" mode
When creating your auto-accept campaign, select the "Invitation & Message" campaign mode instead of "Invitation Only". This tells ReactIn to send a DM after accepting each request.
Write your automatic connection message
Craft a personalized welcome message using variables like {{firstName}}, {{company}}, or {{headline}}. Keep it short, friendly, and value-oriented - not salesy.
Let the automation run
ReactIn will auto-accept the connection request and send your LinkedIn automatic connection message in the same daily run. If a conversation already exists, the DM is skipped to avoid duplicate messages.
Best practices for LinkedIn auto messages after connecting
- Keep it under 300 characters. Short messages get 2x higher reply rates than long pitches.
- Ask a question. Messages that end with a question generate more replies than statements.
- Don't sell immediately. Your first message should start a conversation, not close a deal. Save the pitch for the follow-up.
“Hey {{firstName}}, thanks for connecting! I see you're working in {{headline}} - always great to meet people in the space. Anything I can help with?”
Should You Accept All LinkedIn Connection Requests?
Should you accept all LinkedIn connections, or be selective? This is a common dilemma, especially when you're receiving dozens of requests from strangers. Here's a balanced breakdown to help you decide whether to accept LinkedIn requests from strangers.
Pros of accepting all LinkedIn connections
- Larger network = more reach for your posts and content
- More connections unlock 2nd and 3rd degree access to prospects
- Some "strangers" may be potential clients, partners, or referral sources
- A bigger network signals authority and credibility in your industry
Cons of accepting all LinkedIn requests
- Spam and irrelevant messages flood your inbox
- Fake profiles or bots can compromise your account's reputation
- Your feed becomes diluted with irrelevant content
- LinkedIn may flag your account if you accept too many low-quality connections
The smart middle ground: selective auto-accept
The best approach isn't to accept all or reject all - it's to filter intelligently. With ReactIn's enrichment filters, you can auto-accept connections that match specific criteria and leave the rest for manual review:
- Job title filter: Accept requests from people in relevant roles (e.g., "Marketing Manager", "CEO", "Founder")
- Company size filter: Focus on companies that match your target market (e.g., 10-500 employees)
- Industry filter: Accept connections from industries you serve or want to break into
- Profile completeness: Skip profiles with no photo, no headline, or very few connections - these are often fake accounts
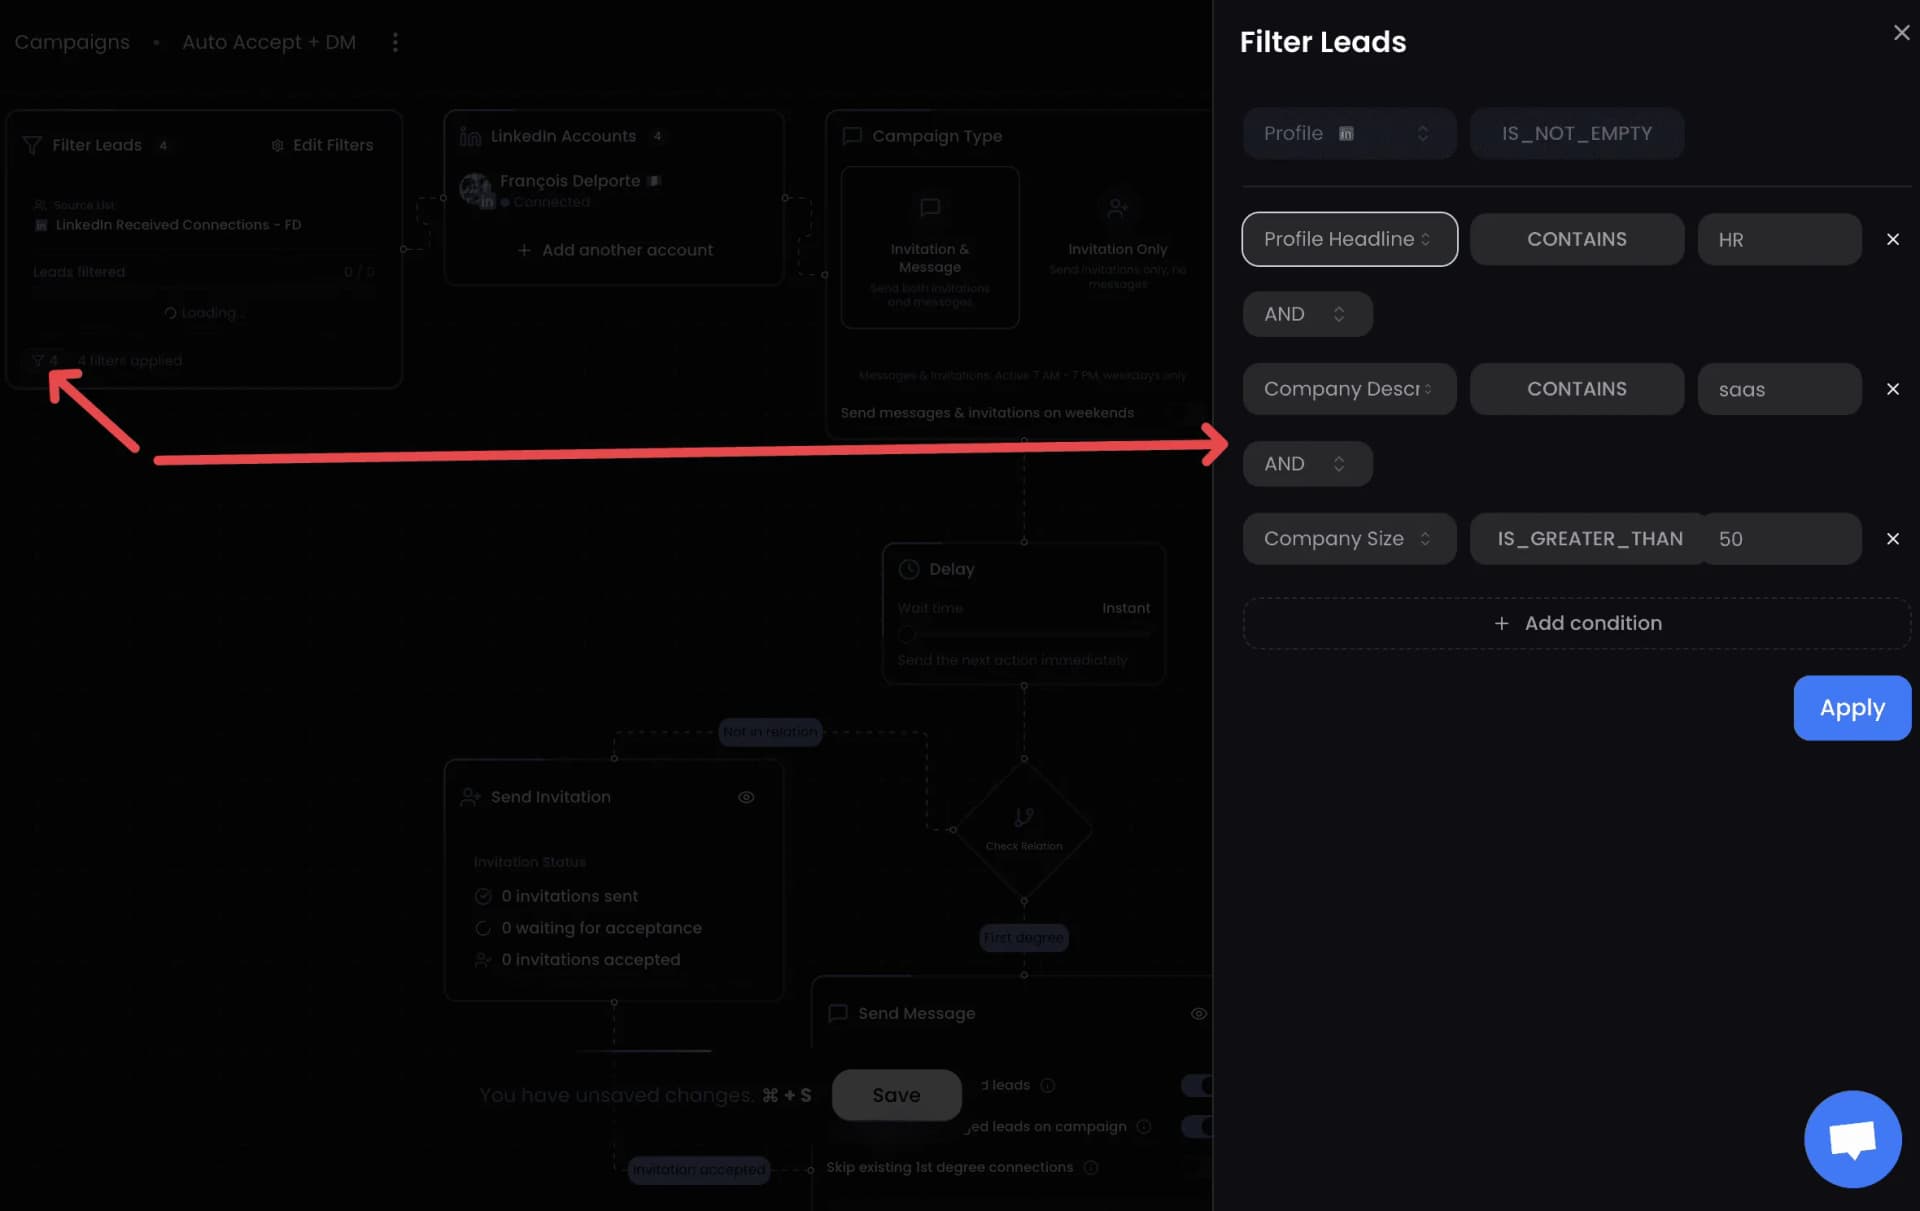
Bonus: Segment with Enrichment Filters
For advanced targeting, ReactIn lets you enrich every new lead with additional data fields:
- Profile Headline (already enriched by default)
- Company Description - understand what the company does
- Company Size - filter by employee count

Example A: Accept Only (Non-targeted)
“IF ProfileHeadline DOES NOT CONTAIN "HR" AND CompanyDescription DOES NOT CONTAIN "SaaS" AND CompanySize IS GREATER THAN 50 → Accept only (no DM)”
Example B: Accept + Send DM (Highly targeted)
“IF ProfileHeadline CONTAINS "HR" AND CompanyDescription CONTAINS "SaaS" AND CompanySize IS LESS THAN 50 → Accept + send personalized DM”
Keep Your Account Safe
Automation on LinkedIn requires precision. ReactIn was built with safety first:
- One daily run - your list refreshes once every 24 hours
- Randomized volume - number of actions varies per day
- Account limits respected - no bulk actions beyond LinkedIn safe zones
- Smart delay system - each action is spaced to replicate human timing
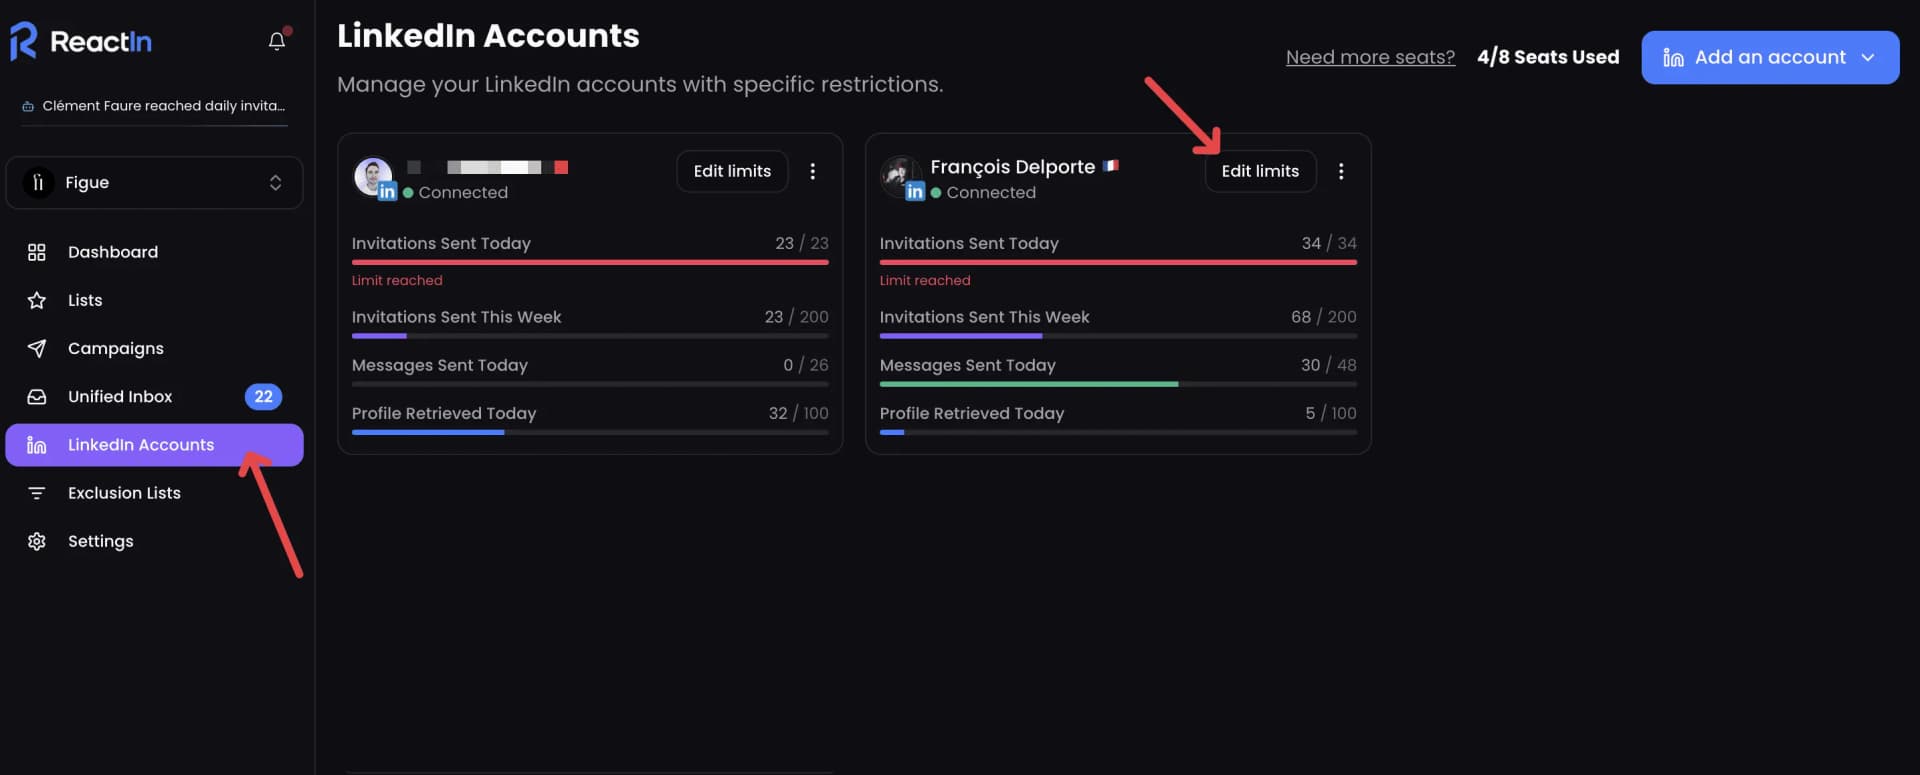
Safe limits by account type:
| Account Type | Daily Limit | Why |
|---|---|---|
| Personal (active) | 10/day | Matches typical human behavior |
| Personal (passive) | 5/day | Lower activity = lower limits |
| New account (<6 months) | 3-5/day | Build reputation slowly |
Conclusion: Automate LinkedIn Connections the Right Way
Automatically accepting LinkedIn connections doesn't mean spamming. Using a LinkedIn auto connect tool means saving time, staying consistent, and engaging smarter. Whether you need to automate LinkedIn connection requests or just handle incoming LinkedIn automated invitations, the key is doing it safely.
With ReactIn's LinkedIn Received Connections SmartList + Auto-Accept Campaign, every new invite becomes an opportunity to start a valuable conversation. It’s the best auto accepter for LinkedIn connections - safe, intelligent, and fully automatic.
Start building genuine relationships at scale today.
“27% average reply rate across 5,000+ user campaigns”
Ready to automatically accept your LinkedIn connections? Create your free ReactIn account and set up auto-accept in under 5 minutes.
This guide is part of our complete LinkedIn automation playbook for 2026 - covering everything from intent signals to safety limits.
Frequently Asked Questions
Sources & Further Reading
- Learn how to manage your LinkedIn connection requests and invitations in the LinkedIn Help Center on managing invitations.
- LinkedIn enforces weekly invitation limits to protect the platform. Understand the current limits in the LinkedIn Help Center on invitation restrictions.
Related Articles

How to Get Started with ReactIn: The Complete Starter Pack (2026)
New to ReactIn? Learn what Spyer, Pixel, and campaigns do, and follow a layer-by-layer starter pack to build an intent-based LinkedIn pipeline that runs on autopilot.

Best Software Affiliate Programs in 2026 (Ranked by Category)
Your software stack costs hundreds a month and earns you nothing. The best software affiliate programs for 2026 fix that, ranked by commission, recurring value and category. ReactIn leads for B2B and LinkedIn audiences, next to Notion, NordVPN, Semrush, HubSpot, Systeme.io and Hostinger.
Best LinkedIn Outreach Tool for B2B SaaS in 2026 (Ranked by Pipeline Quality, Not Feature Lists)
The 7 best LinkedIn outreach tools for B2B SaaS in 2026, ranked by pipeline quality and true cost. ReactIn replaces 3-4 tools ($69/mo vs $500+/mo stack) with intent signals, AI enrichment, and automated campaigns. Full 5-seat cost comparison included.
LinkedIn Prospecting Guide 2026: Build Pipeline With Signal-Based Targeting
The complete LinkedIn prospecting guide for 2026. ICP definition, lookalike audiences, SmartList building, and signal-based targeting. Turn LinkedIn into your #1 pipeline source.

ReactIn Alternatives & Comparisons 2026: Find the Right LinkedIn Tool
Compare ReactIn with every major LinkedIn automation tool in 2026. Head-to-head comparisons with BeReach, Gojiberry, Phantombuster, Waalaxy, and more. Find the right tool for your use case.
Free LinkedIn Tools 2026: 4 Tools to Preview, Scrape, Hook & Coach
4 free LinkedIn tools by ReactIn - no signup required. Preview your posts pixel-perfect, scrape post likers into lead lists, generate scroll-stopping hooks with AI, and get GTM coaching. The complete free toolkit for B2B professionals.

Best LinkedIn Tools 2026: The Complete B2B Stack Guide
The definitive guide to LinkedIn tools in 2026. Automation, scraping, AI sales tools, and CRM integrations - compared and ranked. Build your ideal LinkedIn tech stack at any budget.
Affiliate Marketing Guide 2026: From First Commission to Passive Income
The complete affiliate marketing guide for 2026. Choose your niche, find the best programs (B2B, SaaS, recurring), build your funnel, and scale to passive income. Includes links to our ranked program lists.
LinkedIn Outreach Playbook 2026: From Warmup to Closed Deals
The complete LinkedIn outreach playbook for 2026. Account warmup, connection request strategies, DM copywriting rules, multi-touch sequences, and optimization tactics. Based on data from 5,000+ campaigns.
Best LinkedIn Automation Tool for Agencies in 2026 (Ranked by Total Cost, Not Feature Lists)
The 7 best LinkedIn automation tools for agencies in 2026, ranked by true cost at scale. ReactIn replaces 3-4 tools ($69/mo vs $300+/mo stack) with intent signals, AI enrichment, and unified inbox. Full "True Cost for 10 Accounts" comparison included.

Best Marketing Affiliate Programs in 2026 (Ranked by Niche)
You recommend marketing tools every week and earn nothing. The best marketing affiliate programs for 2026 fix that, ranked by recurring rate, cookie and niche. ReactIn leads for B2B and LinkedIn marketers, next to AWeber, Semrush, GetResponse, Leadpages, Unbounce and Moosend.

Best B2B Affiliate Programs in 2026 (Ranked for Business Audiences)
The best B2B affiliate programs for 2026, ranked by value per business referral and audience fit. ReactIn leads for B2B, LinkedIn and GTM creators with 30% recurring for life, compared against HubSpot, Pipedrive, monday.com, ClickUp, ActiveCampaign and Semrush.

Best SaaS Affiliate Programs in 2026 (Ranked by Recurring Commission)
The best SaaS affiliate programs for 2026, ranked by recurring economics and audience fit. ReactIn leads for LinkedIn, GTM and agency creators with 30% recurring and lifetime attribution, compared against Systeme.io, GetResponse, ActiveCampaign, HubSpot, Kit and Semrush.

Best Recurring Affiliate Programs in 2026 (Lifetime Commissions Ranked)
The best recurring affiliate programs for 2026, ranked by recurring quality, lifetime attribution over 12-month caps. ReactIn leads for B2B, LinkedIn and GTM creators with 30% recurring for life, compared against Systeme.io, Kit, GetResponse, Cloudways, HubSpot and Teachable.

How to Build a LinkedIn Lookalike Audience in 2026 (Full Workflow + Screenshots)
LinkedIn never shipped a native Lookalike Audience for outbound. Here is the full 2026 workflow: pick the seed, write your ICP, run the waterfall scrape, ship a 50-lead audience in under 5 minutes that hits 20-28% reply rates.

LinkedIn Lookalike Audience: How to Find Leads That Match Your Best Customers (2026)
LinkedIn never shipped a native lookalike audience for outbound. Here is how to build one in 3 minutes, with 3 detailed playbooks for agencies, founders, and SDRs hitting 22-28% reply rates.

LinkedIn Lookalike Leads: Clone Your Best Customers in 3 Minutes (2026)
Drop one LinkedIn profile, describe your ICP and persona, and ReactIn returns up to 100 prospects who match. The Meta Lookalike playbook, applied to B2B prospecting. 22% reply rates vs 8% from Sales Nav.

Best Time to Post on LinkedIn in 2026 (50,000+ Posts Analyzed)
When should you post on LinkedIn for maximum engagement? Analysis of 50,000+ posts reveals the best times, days, and strategies to maximize reach in 2026.
LinkedIn Connection Request Note: Character Limit, 2026 Rules & Best Templates
The official LinkedIn connection request note limit in 2026 is 300 characters, on every plan. But notes between 120 and 180 characters win on acceptance rate. Full breakdown, 10 templates, and the difference with InMail and DM limits.
LinkedIn Connection Requests: With or Without a Note? (2026 Data)
Should you add a note to LinkedIn connection requests? 80,000+ requests analyzed. No-note invites get 55–68% acceptance vs 28–45% with notes. See when each approach wins.
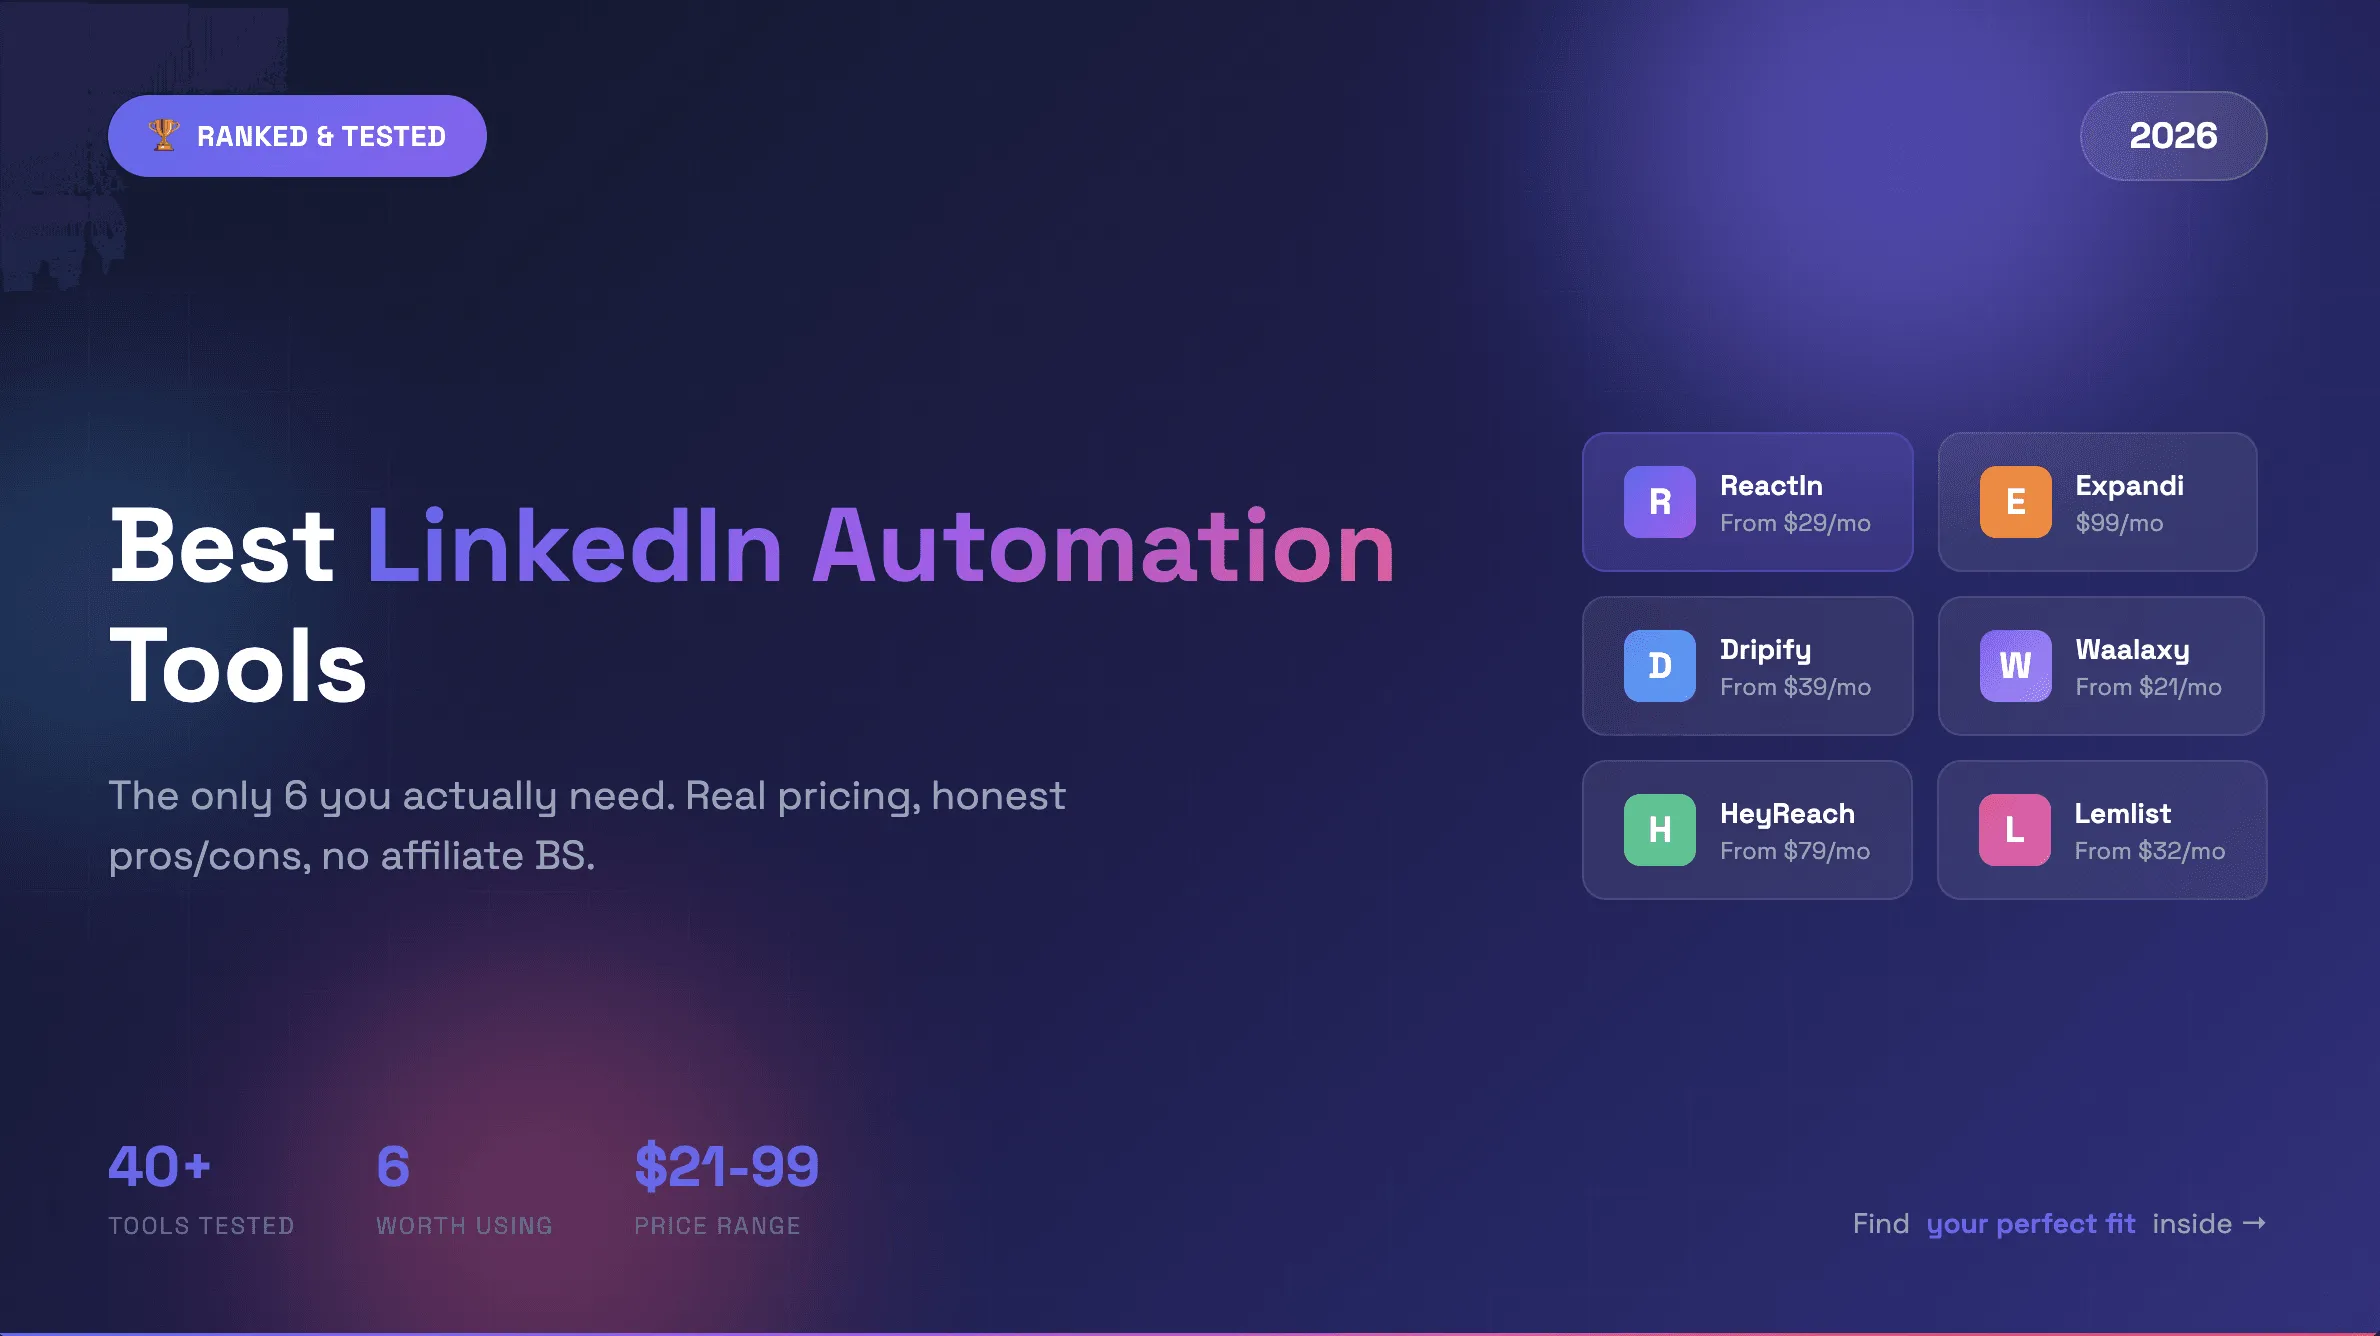
Best LinkedIn Automation Tools 2026 - Top 6 Ranked
Honest comparison of the 6 best LinkedIn automation tools in 2026. Tested hands-on with real campaigns. ReactIn, Expandi, Dripify, Waalaxy, HeyReach, and Lemlist ranked by results.
How to Automate LinkedIn Connection Requests: 5 Rules for 26% Reply Rates (2026)
Stop losing leads. 5 proven rules to automate LinkedIn connection requests safely and hit 26%+ reply rates with personalized welcome messages.
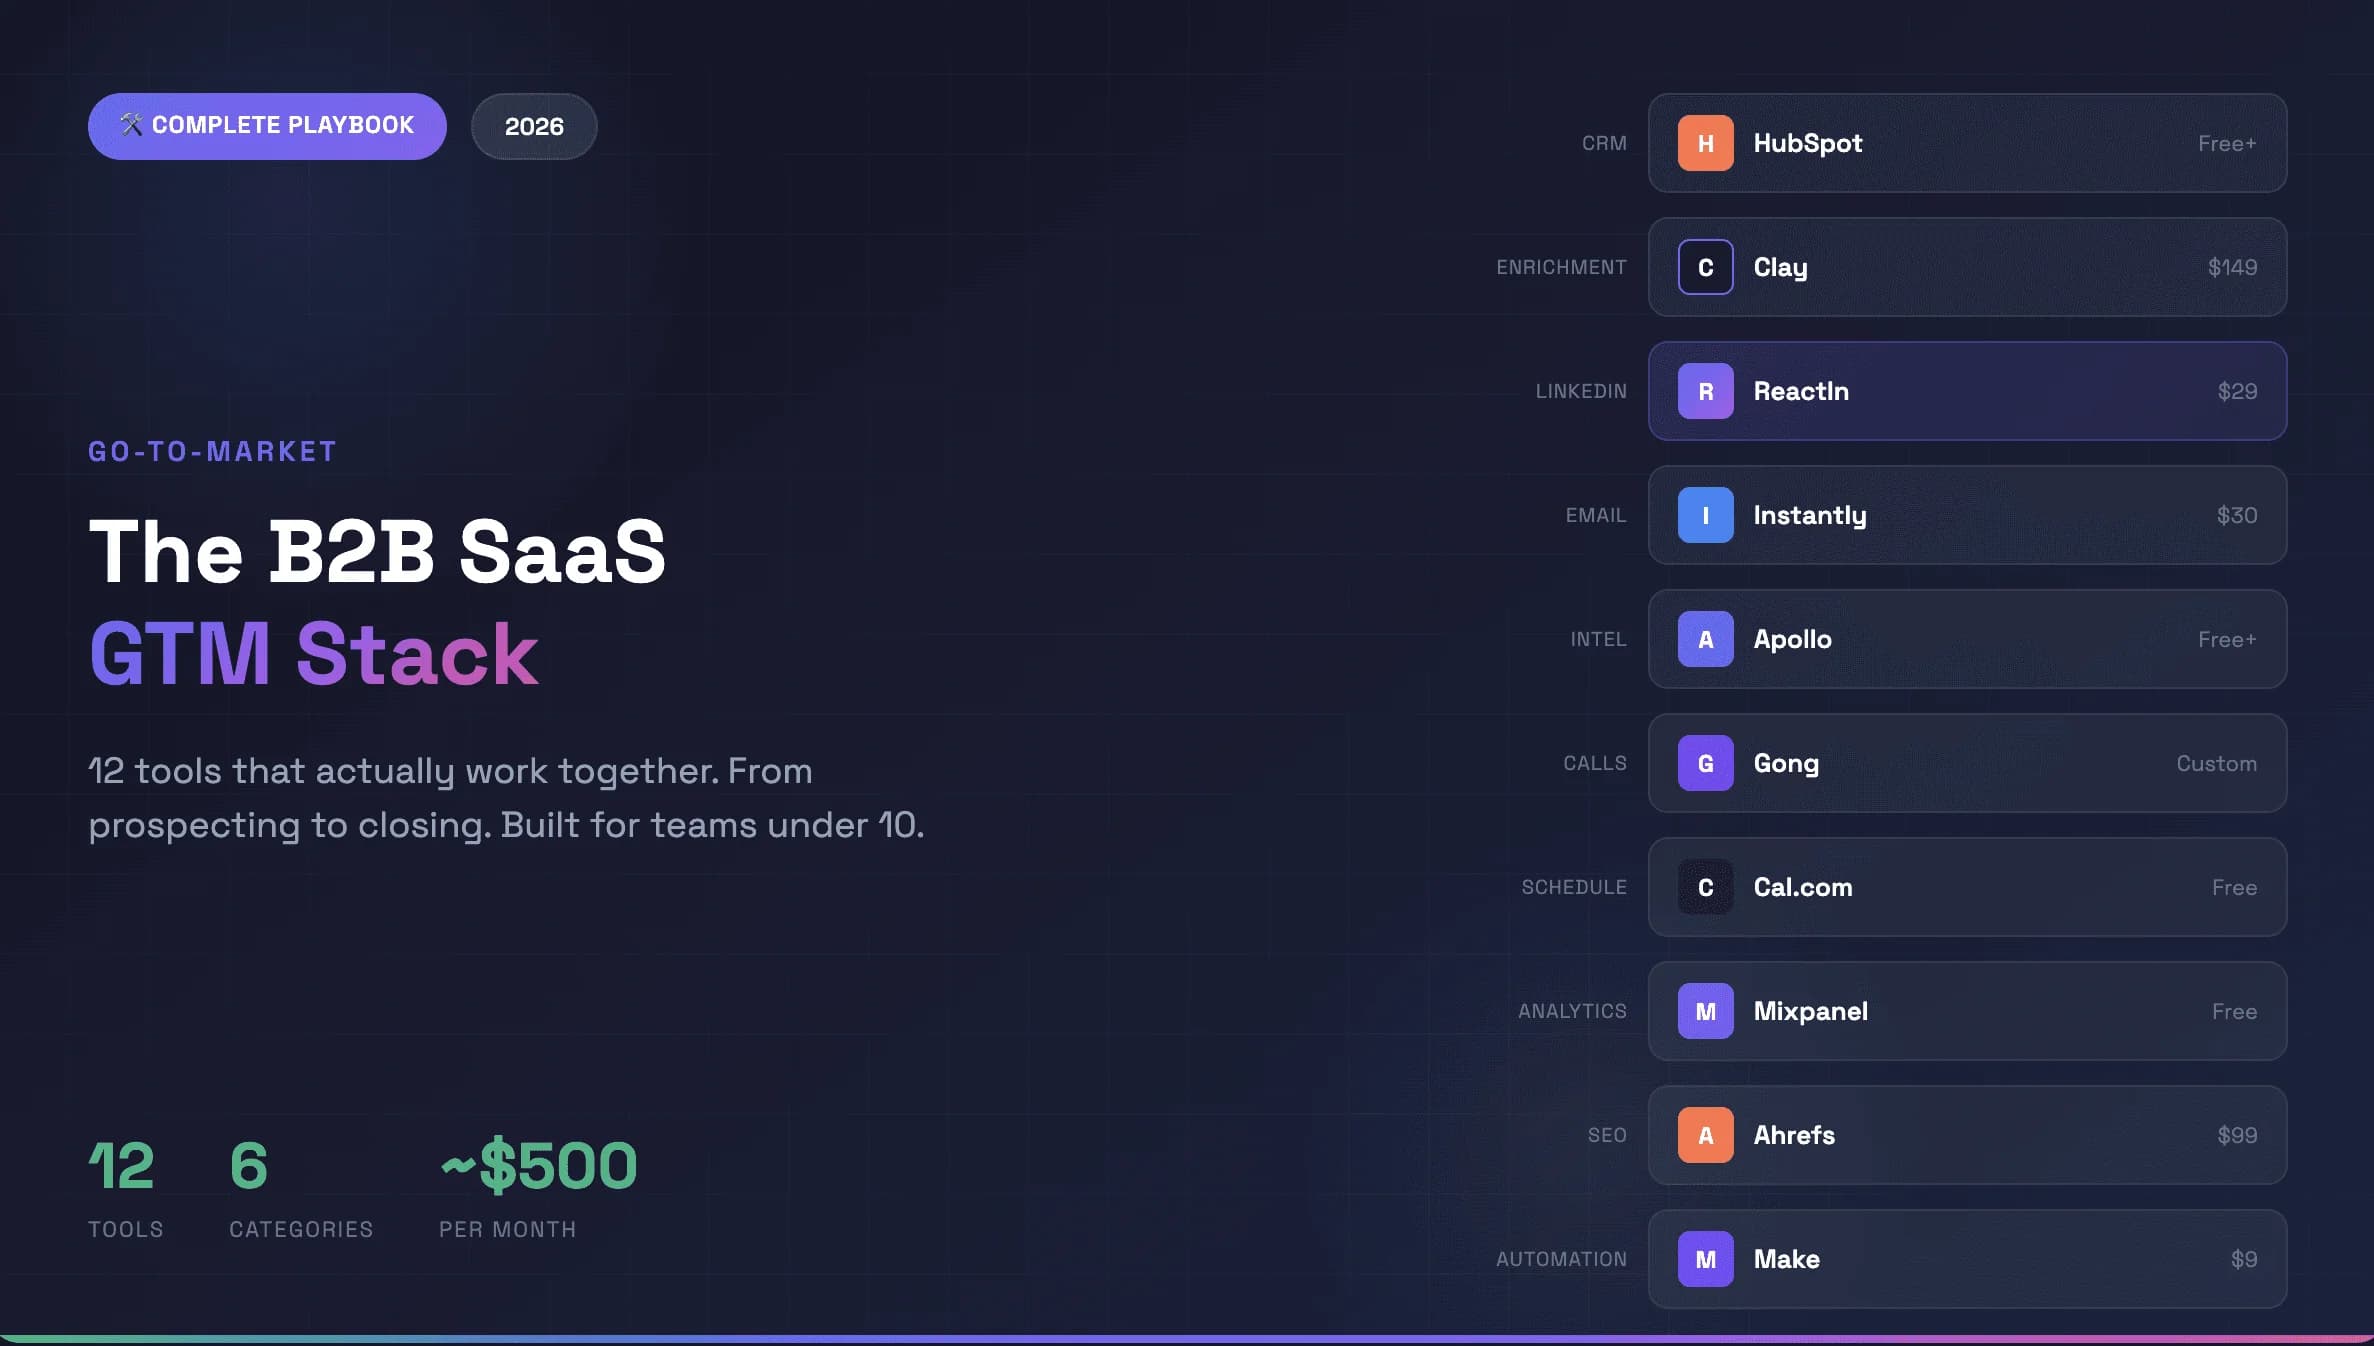
Best Go-to-Market Tools for B2B SaaS 2026: The 12-Tool GTM Stack
The best go-to-market tools for B2B SaaS in 2026. A complete 12-tool GTM stack with automation platforms that actually integrate - from prospecting to closing, built for scaling SaaS businesses. ~$500/month total.
How to Warm Up a LinkedIn Account Safely Before Scaling Outreach (2026)
Step-by-step 4-week plan to warm up your LinkedIn account safely. Daily limits, organic engagement strategy, and how to scale outreach without getting restricted.

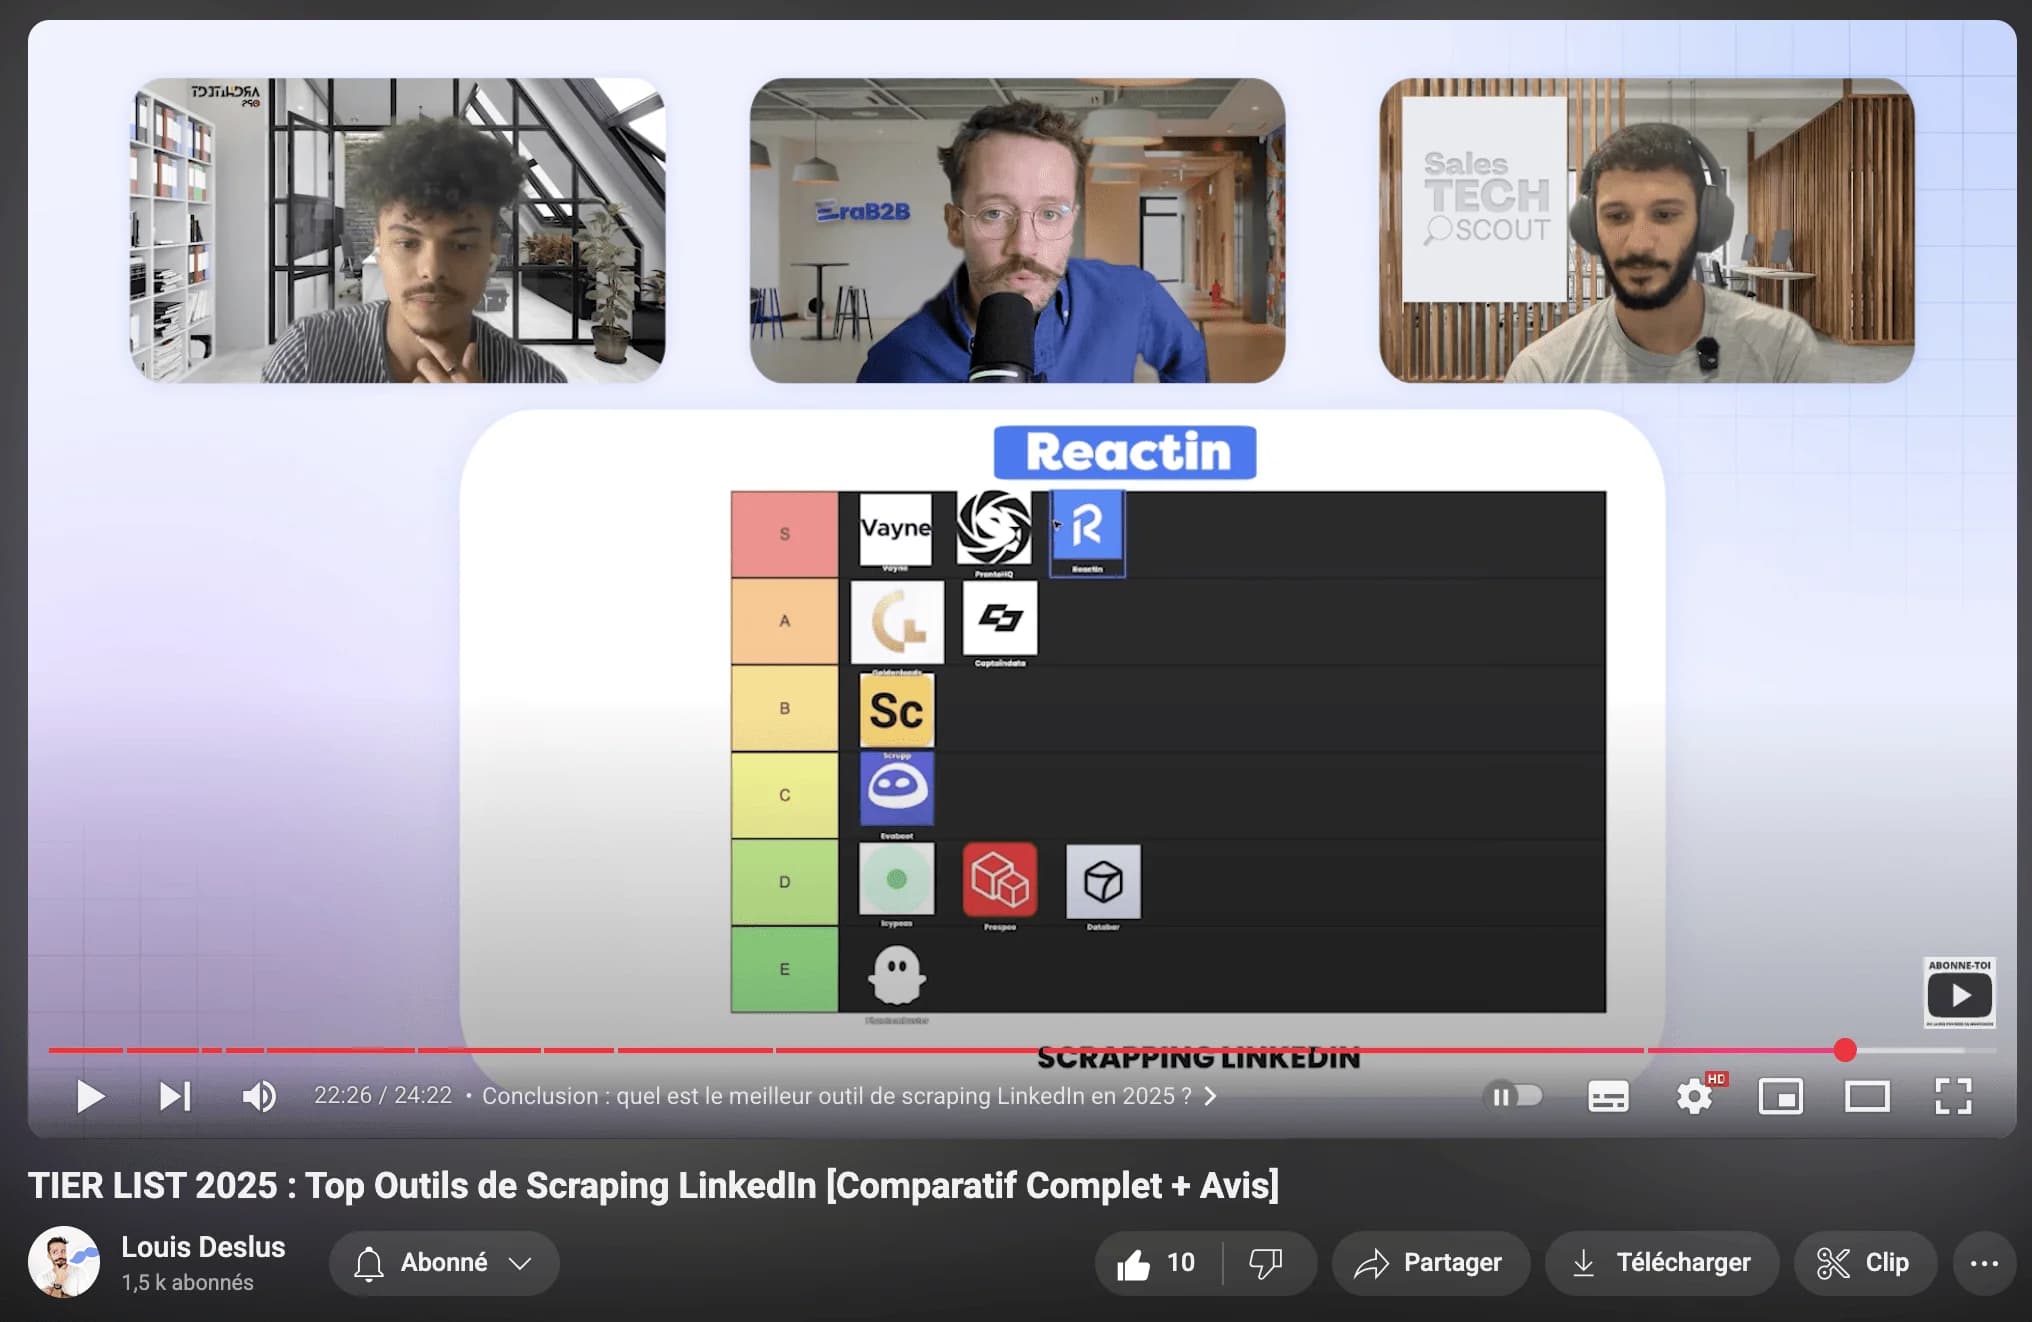
Top LinkedIn Scraping Tools for B2B Growth (2026 Review)
Honest comparison of the best LinkedIn scraping tools in 2026. ReactIn, PhantomBuster, Captain Data, Evaboot, and Prospeo ranked by features, safety, and pricing.
LinkedIn Automation Guide: The Complete 2026 Playbook
The definitive guide to LinkedIn automation in 2026. 5 intent-based workflows, 10 messaging rules, safety limits, and tool comparisons. 27% average reply rate across 5,000+ campaigns.
The 7 Best AI Sales Tools to Close More Deals in 2026
Discover the best AI sales tools in 2026. Top AI-powered tools for closing deals: ReactIn for LinkedIn outreach, Allo as the best AI phone agent, Clay for prospecting, Attio for CRM, and more.

Intent-Based Marketing Automations in 2026: The Complete Guide to 3x Reply Rates
Stop blasting the same message to every lead. Intent-based marketing automations use buyer signals to reach the right person at the right moment - delivering 3x higher reply rates. 5 workflows, benchmarks, and step-by-step setup inside.

How to Balance LinkedIn Campaign Volume Across Tools (Waalaxy, HeyReach, Expandi, Dripify, LGM, PhantomBuster, Gojiberry vs ReactIn)
Most LinkedIn automation tools force you to pick: one big cold campaign, or none. Here is how Waalaxy, HeyReach, Expandi, Dripify, LGM, PhantomBuster and Gojiberry actually let you split daily volume between campaigns - and how ReactIn’s new Campaign Ponderation finally lets you run a 90/5/5 mix of cold + signal-based outreach.

9 LinkedIn DM Copywriting Rules That Get 32-57% Reply Rates (2026)
The average LinkedIn direct message response rate is 8-12%. Our campaigns hit 32-57%. 9 tested copywriting rules, the 5-3-2 rule explained, and how to turn replies into meetings.

ReactIn vs BeReach (2026): Intent-Based Outbound OS or LinkedIn API Toolkit?
BeReach is a LinkedIn API for developers. ReactIn is an intent-based outbound OS for sales teams - 20+ signal sources, SmartLists, AI enrichment, and 27% reply rates out of the box. Full feature-by-feature comparison.

ReactIn vs Waalaxy (2026): Blast Campaigns or Intent-Based Outreach?
Waalaxy is built for mass LinkedIn campaigns. ReactIn is built for intent-based outreach with 20+ signal sources, AI columns, and campaign ponderation. Full comparison inside.

ReactIn vs HeyReach (2026): Volume Rotation or Intent-Driven Outreach?
HeyReach focuses on multi-sender rotation for agencies. ReactIn combines smart rotation with 20+ intent signals, AI columns, and campaign ponderation - all at $69/mo per sender.

ReactIn vs Gojiberry (2026): AI Black Box or Full Control Over Your Outreach?
Gojiberry is an AI SDR black box. ReactIn gives you intent signals with full workflow control: AI columns, editable templates, campaign ponderation, $69/mo per sender.
How to Scrape LinkedIn Comments: Tools, Policy & Lead Gen Guide (2026)
Learn how to scrape LinkedIn comments safely in 2026. Best tools compared, LinkedIn scraping policy explained, and step-by-step guide to turning commenters into qualified leads.
Discover the Secret to Maximizing LinkedIn Engagement with Perfect Timing
A data-driven guide to LinkedIn engagement timing in 2026. Best times and days by region, content type timing, weekend strategies, LinkedIn Ads scheduling, and peak activity hours.
How to Automate LinkedIn Connection Requests in 2026 (Safe Method)
The safe method to automate LinkedIn connection requests in 2026. Daily limits by plan (20-50/day), 300-character note limit, best practices, step-by-step ReactIn setup, and safety comparison of top tools.

LinkedIn Ads Scraper in 2026: 7 Tools to Spy on Competitor Ads (and Steal Their Audience)
The 7 best LinkedIn ads scrapers in 2026, from ad library extractors to engagement scrapers. Most tools stop at ad creatives. ReactIn goes further: it scrapes the people who engage with competitor ads and turns them into a contactable lead list. Full pricing and feature comparison included.